Visual Studio Code Setup, Prerequisites to Create Salesforce Project Using SFDX CLI
This post & video describes about to Setup Visual Studio Code, Prerequisites to create salesforce project Using SFDX CLI, also differentiate about Create Project with Manifest and Create Project Using SFDX
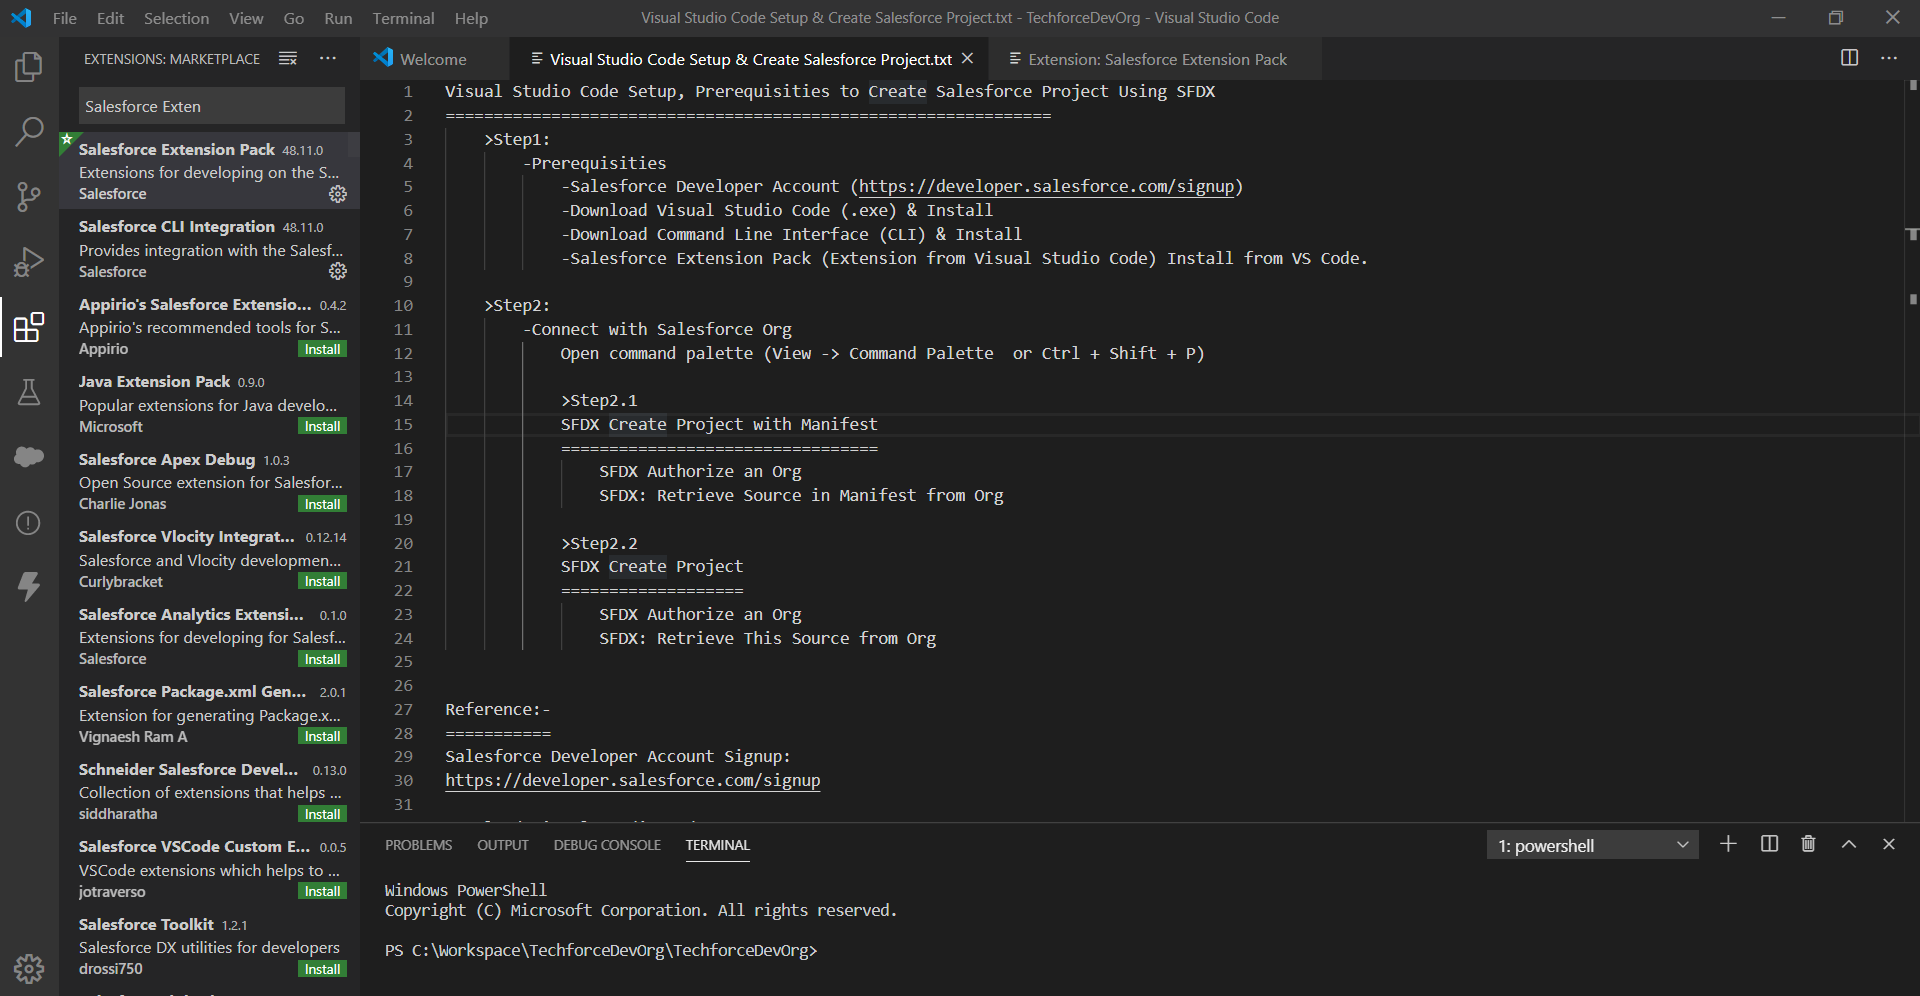
Step 1:
Prerequisites
- Salesforce Developer Account (https://developer.salesforce.com/signup)
- Download Visual Studio Code (.exe) & Install
- Download Command Line Interface (CLI) & Install
- Salesforce Extension Pack (Extension from Visual Studio Code) Install from VS Code.
Step 2:
Connect with Salesforce Org
Open command palette (View -> Command Palette or Ctrl + Shift + P)
Step 2.1
SFDX Create Project with Manifest
SFDX Authorize an Org
SFDX: Retrieve Source in Manifest from Org
Step 2.2
SFDX Create Project
SFDX Authorize an Org
SFDX: Retrieve This Source from Org
Demo to create Salesforce project with Manifest using Visual Studio Code and Create Salesforce Project using Visual Studio Code
Bypass Company Firewall or Web Proxy if you are working on Company Network:
Then set the HTTP_PROXY or HTTPS_PROXY variable and value like below ways:
From Environment variables (My Computer -> Right Click -> Properties and then Select Advance System settings -> Click on “Environment Variables” button
add User Variable & System Variable Sections two add two entries as like below for your company network proxy url, check with your company network team to get the proxy value:
| Variable | Value |
| HTTP_PROXY | http://proxy-company.com:8080 |
| HTTPS_PROXY | https://proxy-company.com:8080 |
Or try to set from your Visual Studio code authorizing a salesforce org if you behind a proxy, like below
Open your terminal in Visual Studio Code:
Then set the HTTP_PROXY or HTTPS_PROXY environment variable to the full URL of the proxy.
For example, on UNIX:-
export HTTP_PROXY=http://proxy.company.com:8080
export HTTPS_PROXY=https:/proxy.company.com:8080
For example on Windows machine:-
set HTTP_PROXY=https://proxy.company.com:8080
set HTTPS_PROXY=https://proxy.company.com:8080
sometime its require to restart your system to reflect the changes.
Reference:-
Salesforce Developer Account Signup:
https://developer.salesforce.com/signup
Download Visual Studio Code:
https://code.visualstudio.com/download
Download Salesforce CLI:
https://developer.salesforce.com/tools/sfdxcli
Trailhead Module – Quick Start: Lightning Web Components:
https://trailhead.salesforce.com/content/learn/projects/quick-start-lightning-web-components/set-up-salesforce-dx
